 |
 |
 |
 |
 |
 |
 |
 |
Intro
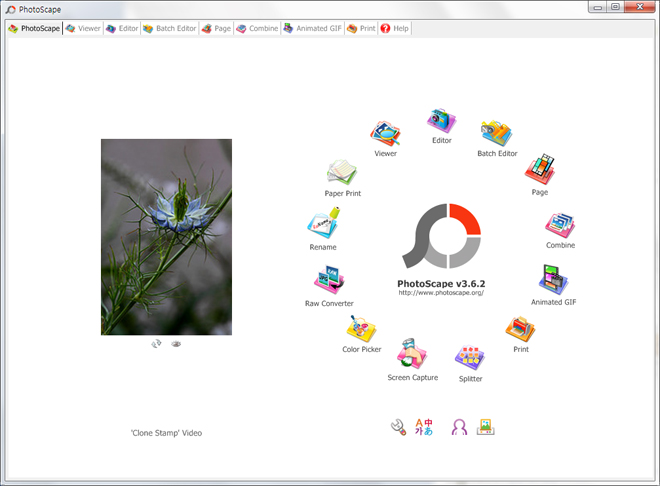
Photoscape is a fun and easy photo editing software that enables you to fix and enhance photos.To begin exploring PhotoScape, read about the modules below:
| |
Viewer - The Viewer tool allows you to view pictures from your computer in bigger sizes and change the orientation. |
| |
Editor - The Editor tool allows you to alter the appearance of pictures. |
| |
Batch Editor - The Batch Editor tool allows you to make similar changes to multiple pictures. |
| |
Page - The Page tool allows you to arrange your photos into a digital picture. How the photos are arranged, how many there are and the appearance of the frame can all be edited using this tool. |
| |
Combine - The Combine tool allows you to link images together into a larger image. The individual images can be placed vertically, horizontally, or in a checkerboard style: both horizontally and vertically. |
| |
Animated Gif - The Animated Gif tool allows you to create an animated gif slideshow of your pictures. |
| |
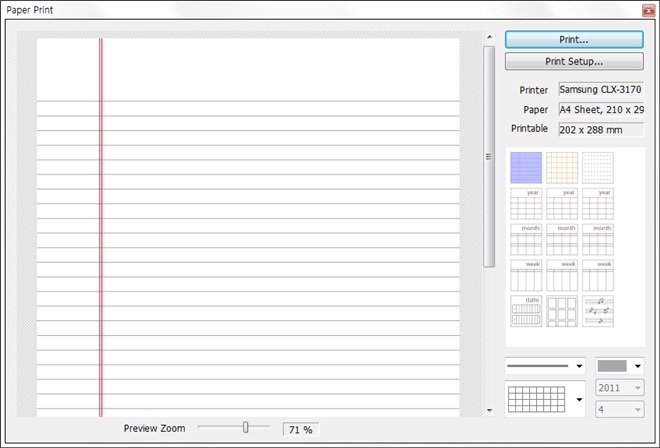
Print - The Print tool allows you to take control of how pictures appear when they are printed. |
|
|
 |
▶ |  |
 |
▶ |  |
 |
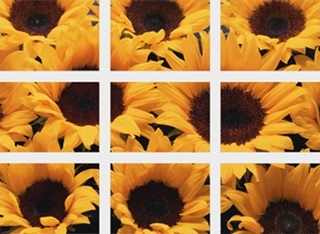
 Splitter
The splitter function of PhotoScape allows you to divide a photo into multiple images. 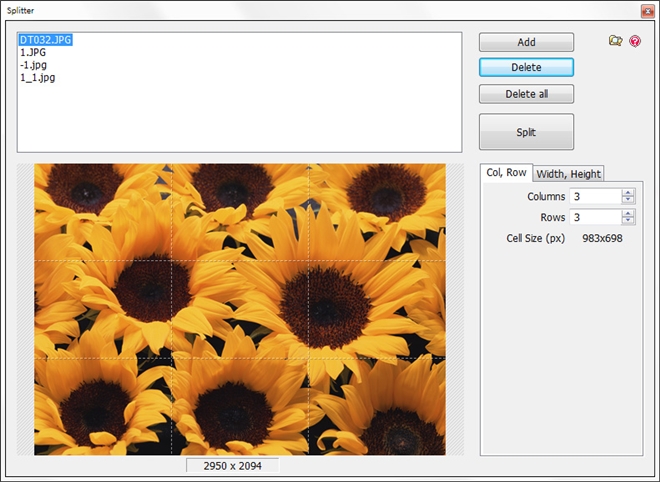
To Add Images to the Splitter Queue
1. Click the Add button from the Splitter Window.2. Select the picture that you wish to split from the browser
3. Click OK.
To Split Photos into Separate Images
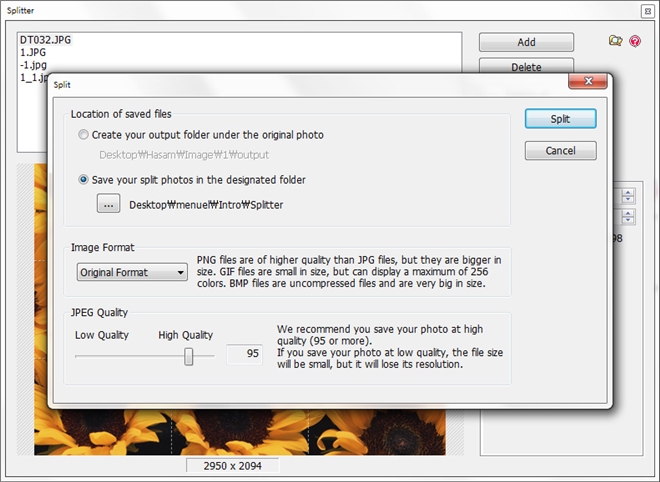
1. Select the photo from the queue. The image will appear in the Splitter Window.2. Click Split after Col, Row or Height, Width settings are satisfactory.
3. After selecting to save to a folder placed at the original image location or save to a designated folder, click Split.
Note: The settings in the Col, Row tab specifies the number of separated image portions to make from the image file (done by splitting the image vertically and horizontally). The Cell Size (px) box details the pixel size of each image portion. The settings in the Width, Height tab specifies the amount of pixels for each separated image portion. The Cols x Rows box details a 2-D dimension of the separated image portions.
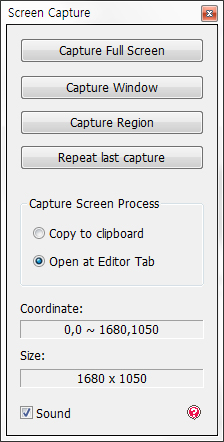
 Screen Capture
| The screen capture function of PhotoScape allows you to take a digital picture of your computer screen. Depending on what function you use, you can capture all or part of your screen and alter the image by using the Edit tool in PhotoScape. |
|
Capturing Full Screen Images
1. Click the Capture Full Screen button from the Screen Capture Window.Note: Capture Full Screen will not include the PhotoScape interface window or the Screen Capture Window in the image.
Capturing a Window
1. Click the Capture Window button on the Screen Capture Window.The PhotoScape interface and the Screen Capture Window will disappear.
2. Move your mouse around the screen to highlight the desired window.
The highlighted selection will be encompassed by a dark rectangle.
3. When the desired window is outlined, click on it.
Note: Different program windows behave differently with PhotoScape, the area you want to highlight may not be available. If the area is not available, you should consider using the Capture Region tool.
Capturing Region
1. Click the Capture Region button on the Screen Capture Window.The PhotoScape interface and the Screen Capture Window will disappear.
2. Click once anywhere on the screen to designate the upper left-hand corner of the area you want to capture. Click again to designate the lower right-hand corner of the area you want to capture.
Note: Different programs behave differently with PhotoScape; some of them may not allow you to use this tool. If the program you are using is incompatible, consider using the Capture Full Screen or the Capture Window tool and using the crop tool to edit out the unwanted areas.
Recapturing Your Last Image
1. Click the Repeat Last Capture button on the Screen Capture Window.Note: This tool captures the current status of a specified area of your screen. If the image in that place has changed since your last capture, your image will too.
Note: Screen Captures will be automatically sent to the PhotoScape Editor tool. You can redirect this transfer to your computer¡¯s clipboard by clicking the Copy to Clipboard function in the Screen Capture Window. This function will copy your screen capture as if you had copied it using right-click and copy. To retrieve an image after it has been copied to the clipboard, right-click in a desired document and then select paste.
Note: The Cartesian coordinates and size (in pixels) of your last capture can be found in the Coordinate and Size box in the Screen Capture Window respectively.
 Color Picker
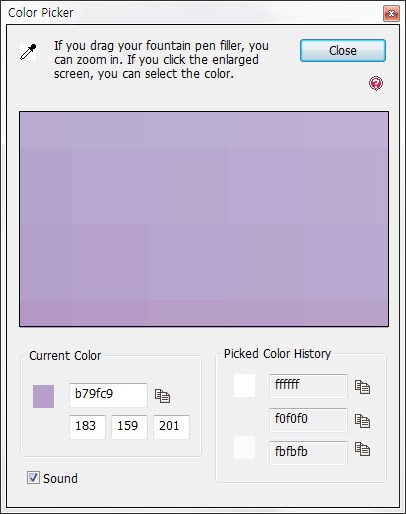
The Color Picker function of PhotoScape allows you to duplicate the exact color properties from anything on-screen. Grabbing a Color from Your Screen
| 1. With Color Picker open, click and drag the Eyedropper icon to the desired area of your screen. |  |
| 2. From the Color Picker window, click on the desired color within the zoomed in area. The color information will be sent to the Current Color section of the Color Picker window. | 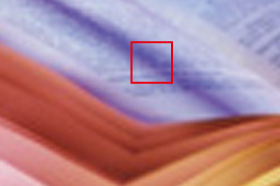 |
Copying Captured Color Information to Clipboard
| 1. From the Picked Color History section of the Color Pickertool, click on the clipboard icon to save the color information to the clipboard. Note: You cannot save more than three colors to Picked Color History at a time. |
 |
 RAW Converter
The RAW converter function of PhotoScape allows you to process a RAW photo (.CR2, .CRW, .NEF, .NRW are the most common format of these) taken by a DSLR camera into a JPG file. 
To Add a RAW file to the RAW Converter Queue
| 1. Click on Add. You may select more than one file at a time. | 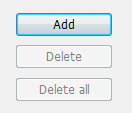 |
To Remove a RAW file from RAW Converter Queue
1. Select the file you wish to remove.2. Click on Delete.
Note: The Delete All button will remove all files in queue.
To Adjust RAW Conversion Options
1. Select one of the options from the Conversion Options section. 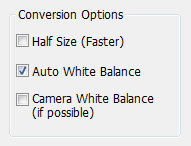 |
Half Size (Faster) - Resizes output image size by half Auto White Balance - Automatically adjusts the color temperature of the photo Camera White Balance, if possible - Adjusts the color temperature of the photo based on your camera's white balance features |
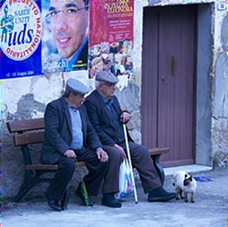 Before white balance adjustment |
▶ | 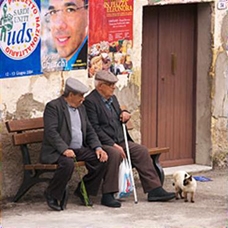 After white balance adjustment |
Previewing Images
To Preview a Photo with Conversion Options Applied1. Select file from RAW Converter Queue.
2. Click on the Preview button.
 Rename
The rename function of PhotoScape allows you to edit the filename of your images individually or as a batch. 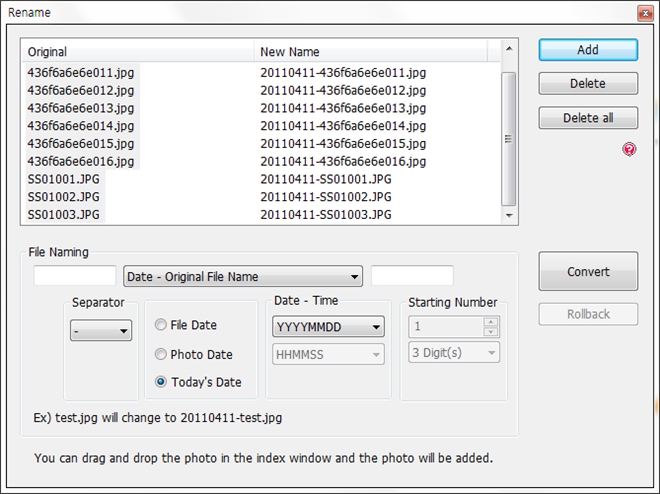
To Add images to Your Queue
1. Click the Add button from the Rename Window. This will open a desktop explorer window.2. Choose the images on your system you would like to rename and press OK.
Note: You can also drag and drop files into the index window instead of browsing through the explorer.
To Rename Images
1. In the File Naming window, choose different naming presets from the dropdown menu(s).2. Click the Convert button.
Note: Rename will overwrite the filename of the original image file.
Note: When using date or time presets, Y stands for year, M stands for month, D stands for day, H stands for hour, M stands for minute, and S stands for seconds. The following are explanations of the date presets:
To Undo Renaming Your File
1. Click the Rollback button.Note: This will only work right after converting your image file. If you add more images to be converted, you will not be able to undo a file rename.
 Paper Print